Rear Door Panel Removal/Installation
NOTE:
RHD model is shown; LHD model is symmetrical.
Take care not to scratch the door and related parts.
When removing components, use the trim tools or equivalent.
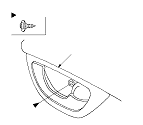
Remove the screw securing the inner handle (A).
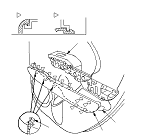
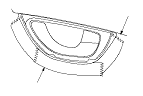
Remove the grip cover (A).
-1.
Using a flat-tip screwdriver wrapped with protective tape, pry out the front bottom edge of the cover while pushing up the hooks (B).
-2.
From front to rear, pry out along the edge of the cover to release the hooks (C, D) from the power window switch panel (E).
-3.
Release the rear hook (F), while pulling the cover forward.
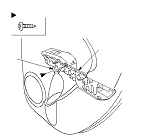
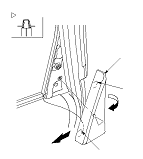
Disconnect the power window switch connector (A). Remove the screw from the grip base (B).
Pull the inner handle (A) forward and out half-way to release the hooks (B).
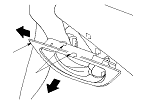
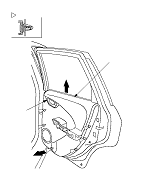
Apply protective tape (A) to the door panel (B) as shown.
Pull out the rear edge on the quarter inner trim (A) to detach the clip, then remove it by releasing the hooks (B).
Remove the door panel (A) with as little bending as possible to avoid creasing or breaking it.
-1.
Start at the bottom edge of the door panel, release the clips with a commercially available trim pad remover.
-2.
Detach the upper clips.
-3.
Starting at the rear, pull the door panel upward.
NOTE: Do not pull the door panel up too far, or the door panel will be damaged by the inner handle (B).
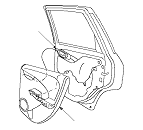
Remove the door panel (A) while pulling the inner handle (B) out through the hole in the door panel.
Install the door panel in the reverse order of removal, and note these items:
If the clips are damaged or stress-whitened, replace them with new ones.
Make sure the connector is plugged in properly.