|
NOTE:
-
Put on gloves to protect your hands.
-
Have an assistant help you when removing and installing the dashboard/steering hanger beam.
-
Take care not to scratch the dashboard, body and other related parts.
-
LHD model is shown; RHD model is symmetrical.
-
-
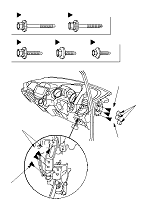
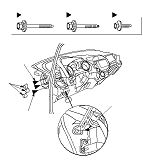
Remove these items:
Driver's side
-
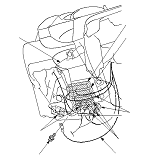
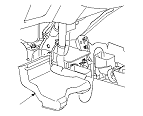
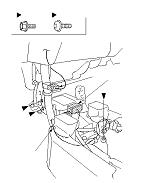
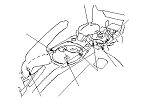
From under the dash, disconnect the right engine compartment wire harness connector (A), the left engine compartment wire harness connector (B), the floor wire harness connectors (C), the driver's door wire harness connectors (D), roof wire harness connector (E), and remove the bolt (F), then release the left engine compartment wire harness (G) from the driver's under-dash fuse/relay box (H).
|