( TF09E4SA20326428521KDAT00 )
Fuel Tank Unit Removal and Installation

Special Tools Required

Fuel sender wrench
 07AAA-S0XA100
Removal
  1. Remove the bolts (A), the wire harness (B), the remove the parking brake lever (C).

  1. Remove the access panel (A) from the floor.
  1. Disconnect the fuel tank unit 4P connector (B).
  1. Disconnect the suction hose (C), the fuel vapor hose (D), the quick-connect fitting (E) from the fuel tank unit.

  1. Using the special tool, loosen the locknut (A).

  1. Remove the locknut (A) and the fuel tank unit (B).

Installation
  1. Temporarily attach a new base gasket (A) to the fuel tank unit (B), then insert the fuel tank unit partially into the fuel tank.
    NOTE:
    • Be careful not to damage the new base gasket.
    • Be careful not to bend the fuel gauge sending unit.
    • Do not coat the base gasket with oil.

  1. Transfer the base gasket (A) from the fuel tank unit to the fuel tank.
  1. Align the marks (B) on the fuel tank and fuel tank unit, then insert the fuel tank unit into the fuel tank until the fuel tank unit rests on top of the base gasket.
    NOTE: To avoid a fuel leak, check the base gasket, visually or by hand, to make sure it is not pinched.

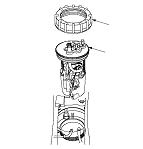
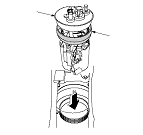
  1. Using the special tool, tighten a new locknut (A) to the specified torque.
    NOTE:
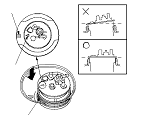
    • After tightening, make sure the marks are still aligned.
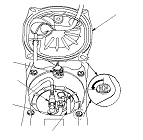
    • After installation, check the base gasket, visually or by hand, to make sure it is not pinched.
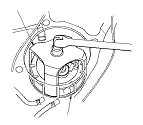
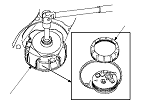
  1. Connect the fuel tank unit 4P connector, then connect the quick-connect fitting, the suction hose, and the fuel vapor hose.
  1. Reconnect the negative cable to the battery, and turn the ignition switch to ON (II) (but do not operate the starter motor). The fuel pump will run for about 2 seconds, and fuel pressure rises. Repeat this two or three times, then check that there is no leakage in the fuel supply system.
  1. Install the access panel, the parking brake lever, and the center console.