( TF09E00J26273400000KDAT21 )
Interior Trim Removal/Installation - Pillar Areas - Without Side Curtain Airbags

Front Pillar Trim
NOTE:
  • Put on gloves to protect your hands.
  • Take care not to bend or scratch the trim and panels.
  • When removing components, use the trim tools or equivalent.
  • RHD model is shown; LHD model is symmetrical.
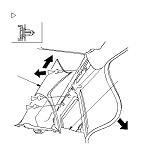
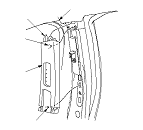
  1. Pull the upper portion of the front pillar trim (A) back by hand to detach the clips and pull the trim up, then remove it from the dashboard (B).
  1. Install the trim in the reverse order of removal, and note these items:
    • Check if the clips are damaged or stress-whitened, and if necessary, replace them with new ones.
    • Push the clips into place securely.

Center Pillar Upper/Lower Trim
SRS components are located in this area. Review the SRS component locations and the precautions and procedures before doing repairs or service.
NOTE:
  • Put on gloves to protect your hands.
  • Take care not to bend or scratch the trim and panels.
  • When removing components, use the trim tools or equivalent.
  • RHD model is shown; LHD model is symmetrical.
  1. Remove these items:
  1. Slide the front seat forward fully, and put the rear seat in the normal upright position.
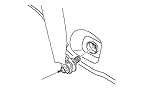
  1. Remove the seat belt lower anchor bolt (A).

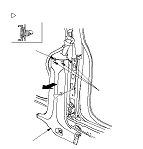
  1. Remove the center pillar lower trim (A).
    -1.
    Pull the upper portion of the trim back to release the upper hooks (B).
    -2.
    Detach the clip by pulling the trim back by hand.

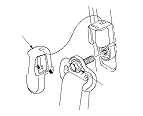
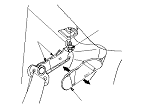
  1. Remove the upper anchor cover (A), and remove the upper anchor bolt (B).

  1. Remove the center pillar upper trim (A).
    -1.
    Pull the bottom of the trim back by hand to detach the lower clip (B).
    -2.
    Pull the upper of the trim back by hand to detach the upper clip (C).
    -3.
    Release the upper pin (D) by pulling the top of the center pillar trim and remove it from the headliner (E).
  1. Install the trim in the reverse order of removal, and note these items:

Quarter Pillar Trim
NOTE:
  • Put on gloves to protect your hands.
  • Take care not to bend or scratch the trim and panels.
  • When removing components, use the trim tools or equivalent.
  • RHD model is shown; LHD model is symmetrical.
  1. Remove these items:
  1. Remove the upper anchor cover (A) by releasing the hooks (B), then remove the rear seat belt upper anchor bolt (C).

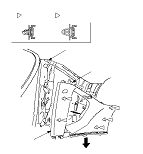
  1. Remove the quarter pillar trim (A).
    -1.
    Pull the bottom of the trim back by hand to detach the clips (B, C).
    -2.
    Pull the trim down to release the upper hook (D) from the body hole (E).
  1. Install the trim in the reverse order of removal, and note these items:
    • Check if the clips and hooks are damaged or stress-whitened, and if necessary, replace them with new ones.
    • Push the clips and hooks into place securely.
    • Before installing the anchor bolt, make sure there are no twists or kinks in the seat belt.