|
Poor AM or FM radio reception or interference
NOTE:
-
Check the vehicle battery condition first.
-
Check the connectors for poor connections or loose terminals.
-
Check the radio reception in an open area.
-
Compare it to a known-good vehicle of the same model, year, and trim level whenever possible.
-
If necessary, have the customer demonstrate the symptom.
-
Poor reception/interference can be caused by the following:
| -
|
The radio station is far away.
|
| -
|
Atmospheric conditions are unfavorable.
|
| -
|
Tall buildings, mountains, or high-voltage power lines are nearby.
|
| -
|
Non-standard antenna element.
|
-
Check if the radio reception/interference is the same as the known-good vehicle in several locations.
|
Is the reception/interference the same?
|
|
YES
|
-
|
|
|
NO
|
-
|
Multipath interference or weak station. Operation is normal.■
|
-
Check the reception/interference while the engine is running, and compare it to the known-good vehicle.
|
Is there noise (static or whine) only with the engine running?
|
|
YES
|
-
|
Check the antenna and radio grounds. If OK, check the charging system, fuel injection system (fuel pump), HVAC (blower motor), and the ignition system.■
|
|
NO
|
-
|
|
-
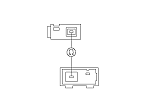
Make sure turn the ignition switch to LOCK (0).
-
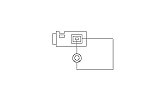
Check the AM/FM antenna element for cracks, or other damage. Make sure that the AM/FM antenna element isn't loose.
NOTE: Do not use any tools to tighten the AM/FM antenna element.
-
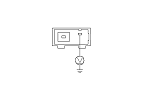
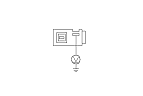
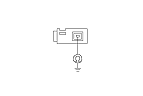
Disconnect AM/FM antenna 3P connector.
-
Turn the ignition switch to ON (II).
-
Turn on the audio unit.
-
Measure the voltage between the AM/FM antenna 3P connector No. 3 terminal and body ground.
|
Is there battery voltage?
|
-
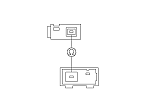
Turn the ignition switch to LOCK (0).
-
-
Turn the ignition switch to ON (II).
-
Turn on the audio unit.
|